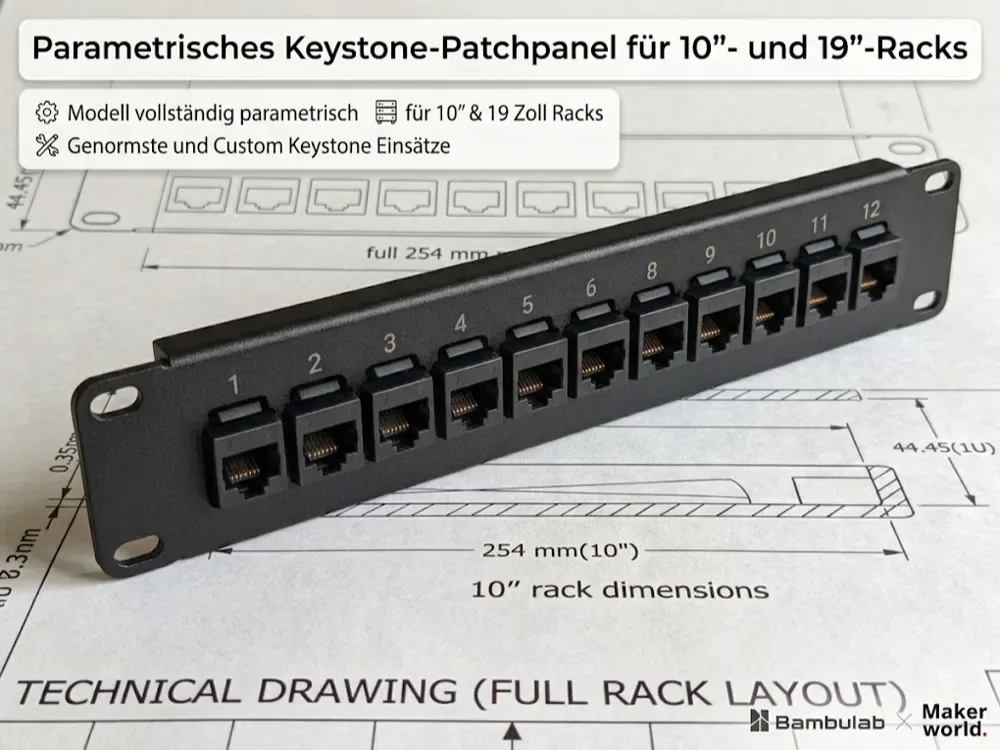
 Design reference photo
Creator photo; included parts are listed below. Accessories not included.
10-inch Keystone Patch Panel — Printed Frame
3D printed in PETG for holding compatible keystone modules in a rack.
Shipping within Canada is included in the listed price. Applicable taxes are calculated at checkout. Secure checkout for Canadian shipping addresses. Choose your quantity on Stripe. Shipping to the U.S.? Contact us for a shipping quote before ordering. U.S. shipping is an additional charge.
Check fit before ordering ↓A closer look
3D printed in PETG for holding compatible keystone modules in a rack. Includes one printed 10-inch patch-panel frame. Hardware, devices, accessories shown and installation are not included.
Check the fit
Start with these details so you can choose the right part for your setup.
- Confirm your board, connector or rack dimensions and mounting-hole pattern before ordering.
What’s included
- One printed 10-inch patch-panel frame.
- Hardware, devices, accessories shown and installation are not included.
Bring modular connections to the front of a small rack
A keystone panel creates a defined front location for separately selected connection modules. In a small rack, that can help group connections in an order that matches the equipment behind them, making routine patching and tracing easier. Decide on the connection plan before populating the frame: identify the devices, leave practical room for leads and choose a labelling method that will remain readable. The printed frame organizes the modules physically; the modules and connected cabling determine which signals the completed panel carries.
Check the rack interface and module fit separately
The frame is a 10-inch design with approximate individual dimensions of 254 × 43.65 × 11.6 mm. Compare its mounting features with the actual rack rails, including fixing positions and the space beside neighbouring panels. Keystone modules also need a fit check at their bodies and retention clips, not only at the visible connector face. Some modules project farther behind the panel or need more access during termination. Establish both interfaces before choosing a complete set of modules, especially if the panel will mix different connection types.
Lay out the rear cables before mounting
A clean front panel needs a workable rear arrangement. Allow space behind each module for its termination, cable bend and any tool access. Group cables so that one connection can be serviced without pulling on adjacent modules, and provide separate support where the cable weight requires it. Trial-fit an unconnected module first to understand insertion and release, then plan the installation order. It is easier to adjust module order on the bench than after every cable is routed into a tightly packed rack.
Keep the panel serviceable as the setup grows
Label connections consistently at the front and in your records, updating both when a port changes purpose. Leave enough access to release a module using its intended method rather than levering against the printed frame. Inspect the mounting areas and module clips during maintenance, and address any cable pull that is bending the frame. Dust the unpowered or disconnected arrangement as appropriate for the installed electronics. No shielding, grounding or electrical performance is supplied by this plastic frame; any such requirements belong to the selected modules, cabling and rack installation.
Product questions
What does the listed price include?
One printed 10-inch patch-panel frame. Shipping within Canada is included in the listed price. Applicable taxes are calculated at checkout. Hardware, devices, accessories shown and installation are not included.
Will this match everything shown in the photo?
The creator photo is a design reference and may show other variants, quantities or accessories. The included-parts list describes exactly what this listing supplies.
Does the frame provide working network ports?
The frame holds separately supplied compatible keystone modules. The modules and cables provide the actual connections; the printed part has no network function by itself.
Can I mix different types of keystone module?
Potentially, if each module fits the openings and has enough rear clearance. Check the body, retention clip and connected cable for every module type you intend to use.
What should I measure behind the panel?
Include module depth, termination access, cable bends and a route to nearby equipment. The panel's own depth is only a small part of the completed installation space.
Original design: Alphaszene — Parametrisches Keystone-Patchpanel für Racks. MakerWorld model 3150622. Original design