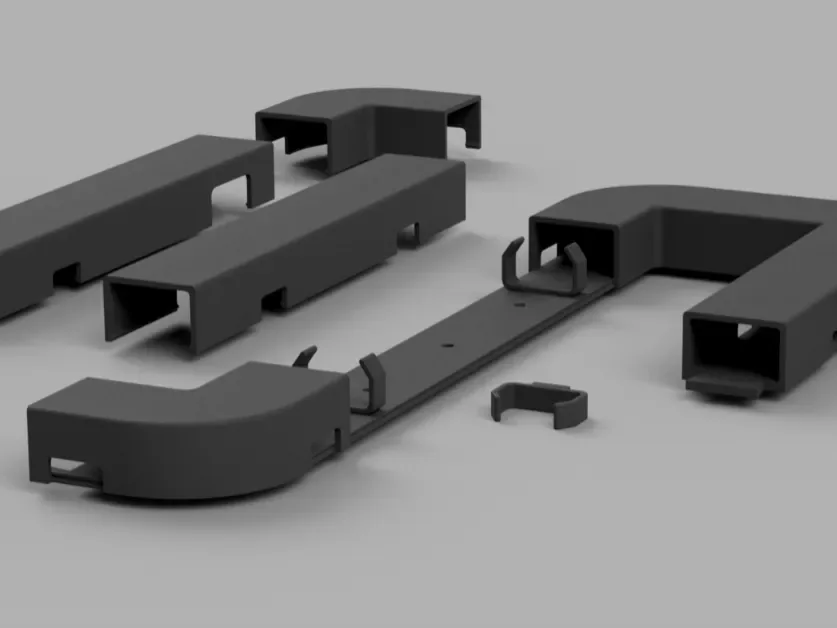
 Design reference photo
Creator photo; included parts are listed below. Accessories not included.
Modular Cable Duct — 200 mm Section
3D printed in PETG for routing cables along a surface.
Shipping within Canada is included in the listed price. Applicable taxes are calculated at checkout. Secure checkout for Canadian shipping addresses. Choose your quantity on Stripe. Shipping to the U.S.? Contact us for a shipping quote before ordering. U.S. shipping is an additional charge.
Check fit before ordering ↓A closer look
3D printed in PETG for routing cables along a surface. Includes one 200 mm design straight rail and its closed cover; corner and junction pieces excluded. Hardware, devices, accessories shown and installation are not included.
Check the fit
Start with these details so you can choose the right part for your setup.
- Compare the opening, cable, shelf or mounting area with the listed design and dimensions.
What’s included
- One 200 mm design straight rail and its closed cover; corner and junction pieces excluded.
- Hardware, devices, accessories shown and installation are not included.
Lay out a short modular cable run
This straight rail and closed cover are useful for establishing a defined cable route along a suitable surface. The 200 mm design section can help organize a short transition between a device area and a longer cable path. Begin by laying out the actual leads, with equipment in its normal position, and identify where they need to enter and leave the duct. Keep the planned cover accessible so later changes do not require removing furniture or neighbouring equipment. For a longer route, count the straight sections separately from corners and junctions. Those changes of direction need their own arrangement and are not implied by the modular product name.
Use the section geometry to check the fit
The two separate components are listed at approximately 200 × 33.8 × 22 mm and 210 × 30 × 3 mm. These are measurements of the separate printed components. The different lengths should not be interpreted as a guaranteed installed overlap or a finished routing length without checking the assembly. Compare the usable channel with your actual cable bundle, including any plug that must pass through during installation. Allow space at each end for the cable bends and for cover removal. Check the surface attachment method before fitting the rail, especially where the surface is thin, irregular, or difficult to reach from behind.
Keep the route understandable when it is closed
Arrange cables so their destinations remain easy to trace, and leave identification visible near the duct entry or exit. Fit the cover only after confirming that the leads lie naturally without compressed jackets or sharp turns against an edge. Leave practical slack outside the section for equipment movement while keeping excess loops away from the covered route. During maintenance, support the cables while opening the cover and remove dust or small debris before reseating it. Inspect the PETG pieces after rerouting a lead or moving nearby equipment. The closed cover gives the run a finished appearance, but a complete installation still needs any separate environmental or electrical provisions appropriate to its location.
Product questions
What does the listed price include?
One 200 mm design straight rail and its closed cover; corner and junction pieces excluded. Shipping within Canada is included in the listed price. Applicable taxes are calculated at checkout. Hardware, devices, accessories shown and installation are not included.
Will this match everything shown in the photo?
The creator photo is a design reference and may show other variants, quantities or accessories. The included-parts list describes exactly what this listing supplies.
Why is the cover listed longer than the rail?
The listing records the separate part bounding dimensions. Confirm their mating arrangement before calculating the finished run; the difference alone does not establish how adjacent sections overlap or connect.
Can I make a T-junction with this order?
This item supplies a straight rail and closed cover. Corner and junction pieces are excluded, so plan a branch or direction change separately and confirm the parts needed for that layout.
How much cable slack belongs inside the duct?
Keep enough room for the intended route and cover seating without crowding. Put necessary device movement loops in accessible locations and check the cable manufacturer's bend guidance rather than packing excess length into the section.
Original design: Lukas — Modularer Kabelkanal. MakerWorld model 2217640. Original design