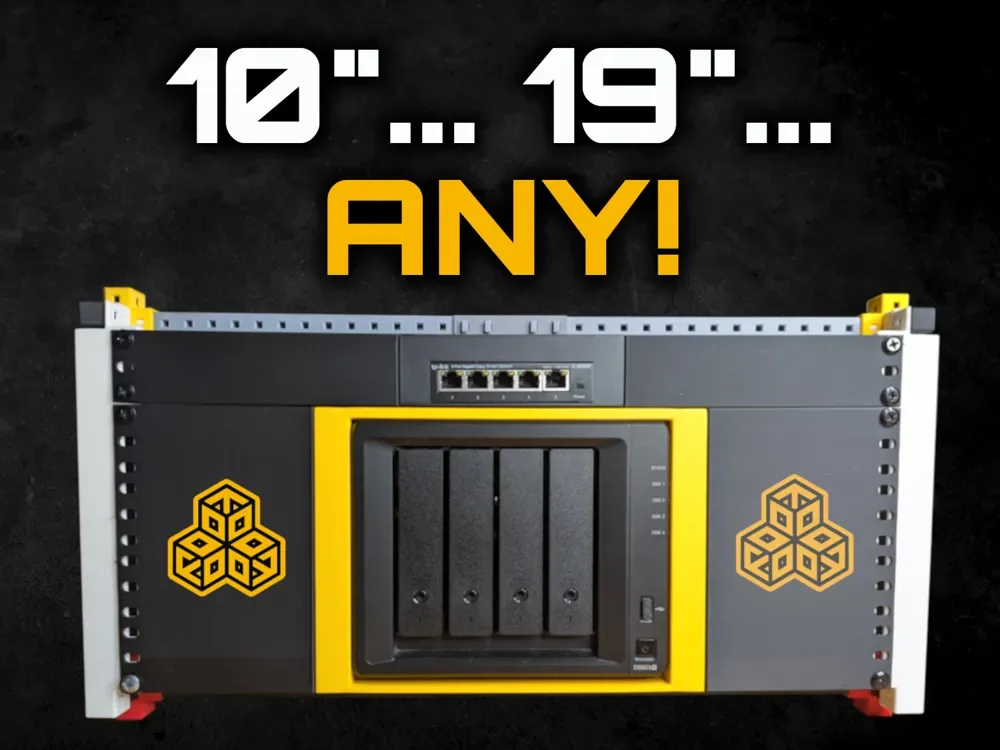
 Design reference photo
Creator photo; included parts are listed below. Accessories not included.
10-inch Rackmount — 100 × 99 × 25.5 mm Device Design
3D printed in PETG for mounting a compatible device to a chosen rack format.
Shipping within Canada is included in the listed price. Applicable taxes are calculated at checkout. Secure checkout for Canadian shipping addresses. Choose your quantity on Stripe. Shipping to the U.S.? Contact us for a shipping quote before ordering. U.S. shipping is an additional charge.
Check fit before ordering ↓A closer look
3D printed in PETG for mounting a compatible device to a chosen rack format. Includes one printed front panel and one bracket configured for a nominal 100 × 99 × 25.5 mm device. Hardware, devices, accessories shown and installation are not included.
Check the fit
Start with these details so you can choose the right part for your setup.
- Confirm your board, connector or rack dimensions and mounting-hole pattern before ordering.
- The specified device design is 100 × 99 × 25.5 mm; confirm the actual mounting and ventilation clearances.
What’s included
- One printed front panel and one bracket configured for a nominal 100 × 99 × 25.5 mm device.
- Hardware, devices, accessories shown and installation are not included.
Give a small device a planned rack position
This two-part rackmount is configured around a nominal 100 × 99 × 25.5 mm device in a 10-inch rack arrangement. It is useful when a compatible small device otherwise sits loose on a shelf or occupies an awkward position among patch leads. Plan the rack location around the connections you use most, the indicators you need to see, and the direction in which cables leave the device. The front panel and bracket should make the device easier to locate and service as part of the rack. Consider the finished layout with neighbouring equipment present rather than judging the empty bracket in isolation.
Compare the whole device with the design envelope
The nominal device dimensions are a starting point, not a guarantee that every box of that size has compatible features. Check feet, projecting buttons, connector housings, ventilation openings, and any irregular corners. Compare the intended mounting arrangement with the device's contact surfaces so it can sit naturally without blocking useful features. The panel and bracket measurements listed separately are component bounding sizes, not the assembled rackmount dimensions. Also check your rack's rails, holes, and available depth, including the space taken by connected plugs. A measurement sketch with front, side, and connector views is useful when confirming a device that has no exact model match in the listing.
Keep removal and cable access practical
Trial-position the device and printed parts before attaching the complete arrangement to the rack. Confirm the hardware and assembly method, then check that the device can be removed without dismantling unrelated equipment. Follow the device manufacturer's guidance for ventilation and operation, and route cables without pressing them against the bracket. Service loops should allow deliberate unplugging without leaving unnecessary cable weight on a port. During later changes, inspect the PETG pieces and the seating of the device, especially if a larger cable plug or added adapter changes the clearance. A mount remains useful when its original fit and handling access are preserved as the rack evolves.
Product questions
What does the listed price include?
One printed front panel and one bracket configured for a nominal 100 × 99 × 25.5 mm device. Shipping within Canada is included in the listed price. Applicable taxes are calculated at checkout. Hardware, devices, accessories shown and installation are not included.
Will this match everything shown in the photo?
The creator photo is a design reference and may show other variants, quantities or accessories. The included-parts list describes exactly what this listing supplies.
Will any device measuring 100 × 99 × 25.5 mm fit?
Not necessarily. That nominal envelope does not describe feet, ports, vents, controls, or the surfaces used for retention. Compare those details with the bracket arrangement before relying on dimensions alone.
Which rack measurements matter most?
Check rail and hole geometry, space behind the front mounting plane, and clearance for connected plugs and cable bends. Include any cabinet door and neighbouring devices in the finished layout.
Can I leave the device connected while removing it?
That depends on the device and available cable slack. Plan a service procedure that avoids pulling on ports; disconnecting cables first may be easier when the rack is compact or the bracket is closely fitted.
Original design: KellerLab — Customizable Rackmount [ANY RACKSIZE]. MakerWorld model 2128492. Original design