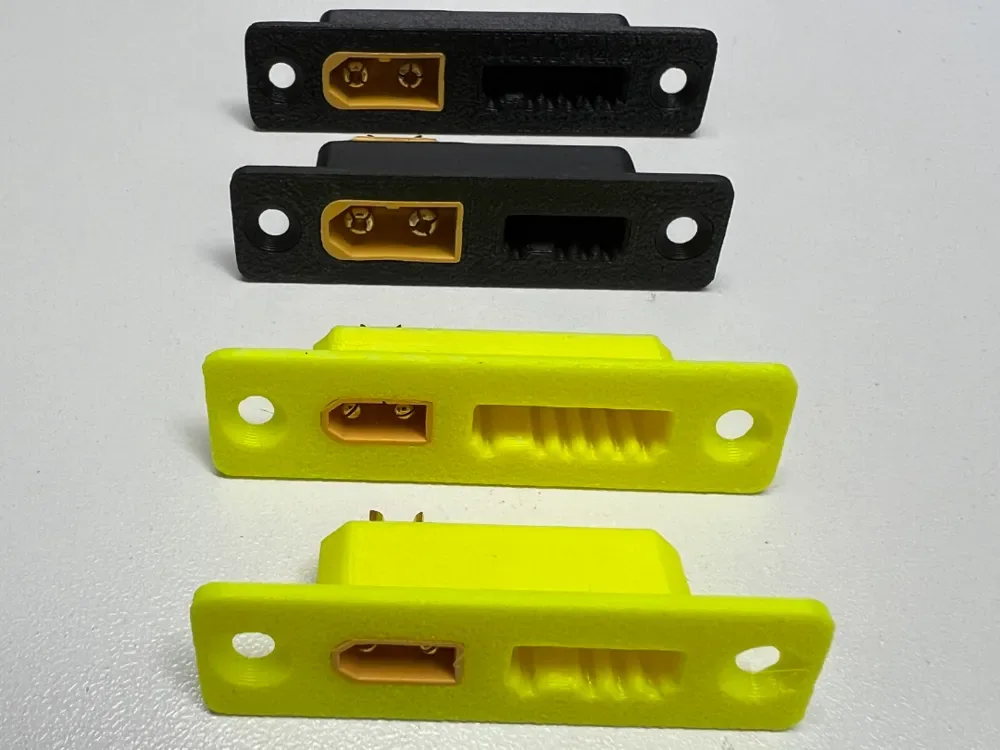
 Design reference photo
Creator photo; included parts are listed below. Accessories not included.
XT60 and 4S Balance Connector Mount
3D printed in PETG for holding separately supplied connectors in a project.
Shipping within Canada is included in the listed price. Applicable taxes are calculated at checkout. Secure checkout for Canadian shipping addresses. Choose your quantity on Stripe. Shipping to the U.S.? Contact us for a shipping quote before ordering. U.S. shipping is an additional charge.
Check fit before ordering ↓A closer look
3D printed in PETG for holding separately supplied connectors in a project. Includes one XT60 plus 4S balance-connector mounting bracket. Electronics, batteries, metal contacts, fasteners, accessories shown and installation are not included.
Check the fit
Start with these details so you can choose the right part for your setup.
- Confirm your board, connector or rack dimensions and mounting-hole pattern before ordering.
What’s included
- One XT60 plus 4S balance-connector mounting bracket.
- Electronics, batteries, metal contacts, fasteners, accessories shown and installation are not included.
Give the two connectors a deliberate location
An XT60 and a 4S balance connector can be awkward to manage when both are left loose in a project. This mounting bracket provides a printed location for compatible, separately supplied connector bodies. Plan its position around how you will actually reach the plugs: the main connector and balance lead should each remain visible and accessible without having to move the other cable first. A useful layout also leaves the project easy to inspect. Keep enough room to see connector orientation and to hold the plug body during insertion or removal. The value of the bracket is mechanical organization; the wiring scheme, charging arrangement, and electrical suitability remain properties of the components and project you build.
Check connector bodies and cable exit space
Compare the exact XT60 and 4S balance-connector housings you intend to use, including their outer shape, shoulders, and wire exit direction. The bracket measures approximately 54.96 × 14.3 × 12 mm overall, but those bounding dimensions are not connector opening measurements. A cable boot or unusually bulky housing can change how a nominally matching plug fits. Before committing to an enclosure position, check both the back of the connectors and the space in front for mating plugs. Allow the wires to leave without an immediate sharp turn, and keep the location reachable after the rest of the project is assembled. Confirm the bracket fixing arrangement separately from connector fit.
Plan assembly around service access
Trial-fit the printed bracket and connector bodies with the project disconnected from its power source. Check that the bodies seat naturally and that handling a plug does not pull directly on loose internal wiring. Any needed cable restraint should be planned as part of the project rather than assumed to come from the printed bracket. After positioning, inspect for pinched insulation, contact interference, and inaccessible plug grips before energizing the completed assembly. When servicing the project, support the connector body instead of levering it against the mount. Keep the PETG part clear of soldering work and inspect it if a cable is pulled or the enclosure is knocked. This helps distinguish a wiring issue from a fit or mounting issue.
Product questions
What does the listed price include?
One XT60 plus 4S balance-connector mounting bracket. Shipping within Canada is included in the listed price. Applicable taxes are calculated at checkout. Electronics, batteries, metal contacts, fasteners, accessories shown and installation are not included.
Will this match everything shown in the photo?
The creator photo is a design reference and may show other variants, quantities or accessories. The included-parts list describes exactly what this listing supplies.
Does this set the battery wiring or cell configuration?
No. The bracket positions connector bodies and does not determine wiring, polarity, protection, or charging settings. The 4S wording identifies the intended balance-connector arrangement, not a complete battery or charger supplied with the product.
Can the connectors be placed behind an enclosure panel?
Possibly, if the bracket, connector bodies, mating plugs, and wire exits all have suitable clearance. Check panel thickness and access to the proposed fixing points before choosing the final mounting position.
What is useful for checking a connector variant?
Provide photos of both connector bodies, their outer dimensions, and the cable exit arrangement. Include the proposed panel or enclosure location so fit can be considered with the actual plugs and available handling space.
Original design: Jakob1508 — XT60/30 + JST-XH 6S/4S/3S/2S Mount srew in. MakerWorld model 1605037. Original design